Showing posts with label How To. Show all posts

Sunday, July 18, 2021

Jumprope App - Creating How-To Guides

October 2021 Update: Toot the horn folks - Jumprope is no more. Kicked the bucket a few months ago. I really like the focus on making it super easy to create a tutorial. Ah well, they come and they go.

Historical Page of the Deceased App

There are some of us that honestly just like to share what we know. But there is a gowning media market regarding selling via education type products. Nothing wrong with that. People have been doing it for centuries.

The tech has changed but the desire to share what we know is in our blood. One of the companies that make it easy to create education products is called Jumprope. Users can create educational guides that can be shared on social media or on a blog or website. 

The How-To guides can be:

  • Photos with captions
  • Photos with audio
  • Photos and video
  • Video with captions

How it Works

This is an example video from the company explaining how to create a guide.


What You Will Need

For creating a Jumprope guide, mobile users will need to download the app via Apple App Store or Google Play.

Devices

Android phones and tablets running Android 6.0 or higher.

Apple phones and tablets running iOS 11.0 or higher.

Desktop Browsers: you can view Jumprope guides via any browser but you cannot create them.

What Can You Do With a Jumprope Guide:

  • Quickly create how guides and videos.
  • Use it to demonstrate skills and expertise.
  • Use it as a means to generate income with affiliate links to the products used in the guide.
  • Repurpose prior content.
It is one of the quickest ways to create educational type content. 

It is bone easy to do and it cost you nothing to check it out.


Sunday, July 11, 2021

Brief Description of Audio and Video Hosting Services

So you want to make money doing a podcast or via YouTube. And you notice that you are supposed to do something but you are not quite sure what to do.

For those that just like to skim, here you go...

Gif Animation of Uploading to Media Host Process


Long winded version...

You go to a podcast forum or watch videos to find the answer to question 1 - what do I need to do?

Then you ask question 2 - what is a good audio or video hosting company? 

Not a bad question. It is legit respectable one.

What often happens is that people give the answer according to their personal experience.

Sometimes with actual knowledge of other services. More often just repeating what others have said.

Then there are those with incentives - the helpful person provides an affiliate link to the services. This is known as a kickback. If they don't disclose it, it is an un-ethical kickback.

I think that long before the hosting questions folks should ask:

  • Who are you and why do you want to do this? 
  • What do you want to do?
  • What is your skill or tech level?
  • What is your budget?
  • What are your expectations and hope to get out of this?
Very few people want to think about that kind of stuff. They get a little bit of info and just asked the question about hosting.

But if you know the above answers, it could help you choose your media hosting company. 

I'll try to be a simple as possible.  I think it is important to know what the process is before you make a decision about choosing a hosting service. 

Because there is some high tone flimflam mischief going on. 

Some by opportunists. Some by major corporations. 

Free isn't always free and there are people who want to convince you to rob yourself for their benefit.

I think you should avoid that. One way to do that is understanding the media hosting process. 

Step 1 - You make a recording. 


You want other people  to view or listen to your recording. You will need a service to host your media file. Is this an absolute statement?

No.

There are people that trust no person or any business with their content. These folks host their media files on their own servers that they maintain and protect. They write their own RSS feeds. 

There are other people that figure out how to game the system. Doing things they should not be doing. And are smart enough not to brag about it.

You are not them. You need a media hosting company. Your web or blog hosting company probably will insist upon it. They don't want to host your media files. Or charge you extra and that is only to host your media files. 

Keep reading.

Step 2 - RSS and Distribution


You've uploaded the media file to the hosting service. You have also provided essential information about the file, like the name, type of show, cover art and descriptions of the content.

An RSS feed is generated by your hosting company. Think of it as a roadmap of the route identifying where your media file can be located. The RSS feed will be sent to podcast and media distribution companies.

These companies will make a space at their site to display your media file on a specific page with the cover art, description and all of your prior and future episodes.


Step 3 - Information if you please...

The other services most reputable services provide you as the creator is information about who is consuming your content, when are they listening or watching or even when they are bugging out. If you have a 30 minute show and they are tuning out by minute five, that can be very helpful to know.

Other distribution services allow their users to make comments about what they like and don't like about the show. They can rate it. They can gush over it. 

Or in the case of YouTube comments, things can head south very quickly.

Step 4 - Additional Services


For the consumer the distribution company can provide other shows that are similar that the consumer would enjoy. Or make it easier to find and play the content.

For creators, some distribution companies can provide their own statists on usage. You hosting company would be able to draw information from all of the companies that are using the RSS feed. 

If you want more of the technical or want to know more about RSS feeds then you can't go wrong by checking out the 2016 version on Transom.org


Saturday, March 20, 2021

Create Podcast Audiograms with Veed.io

There are dozen's of podcast audiogram services that have easy interfaces and one that are not easy but give you a lot of flexibility. The trick is to find the service for you, your budget and skillset. 

This is a quick look at a service called Veed.io

What You Will Need

The website would like you to register/sign in. However, you can actually give it a test run without a  account if you land on a template information page. I appreciate sites that let's folks try before you subscribe.

Devices:

iPad/Mac/Linux/Windows via a browser.

Assets:

Podcast album art

Audio recording - mp3 or wav format

Getting Started

Looking at the Create section of the Veed.io website is like finding a needle in a haystack. 

There are a lot of templates that do similar things. The template make it easy to get the task done but you have to figure out which one gets you closer to what you want. 

At the time I was checking out the site, there was no podcast audiogram template. There is a Voice over Video template. There is also a music visualization template, if you want a sound wave image.

Both of those will get you in the neighborhood of a podcast audiogram. This is a tutorial video from the company.


Advantages

Once you land on the right template page, it is an easy process. 

The free version has a watermark in the upper left corner and you are limited to under 10 minute podcast audiograms. 

The videos will be rendered in 720p. If you are uploading an album cover and voice that might not make a difference to you. 

In addition to the tutorial videos on their YouTube channel, you have instructions about the various styles and their other apps, services and social media tips. 

Other than that, there is no other support for free users. Paid basic users get chat based tech support, 1080p videos and 20GB of storage.  

Disadvantages

It was a little fiddly to get started. But once you get use to the interface, it was bing, bang, boom and you are done. I had to find the right how-to information page for audiograms. 

Sometimes I'd click something on the main website and was bounced to the YouTube channel. Where there a a lot of videos. And yes, there is a filter at the top of the YouTube channel page so that you can search for a specific term. 

I don't always remember to do that. 

Once you land on the right template, don't assume that there isn't addition options on the screen. You might have to scroll down to see them. You necessarily have to accept the default items. For example, I found out by accident that there were more sound wave options.

Summary

If you are a hit it and quit person who wants to make videos, you will like Veed.io. All you have to do is add your assets, make a few tweaks and get an audiogram. 

If you have to crank out podcast audiograms this makes it bone simple. I'm thinking about people that want to change the album cover every week but everything else remains the same. 

I'm also thinking of those folks that do not like timelines. or traditional video editing programs.

I liked the easy way I could correct the transcription but in my test video it was very short. If I had to clean up more than a minute or so, that could be a concern. 

I also liked the ability to make gifs from a video - I can see an education use for them and this is the easies way I've seen without having to subscribe to a gif service.

For non-tech folks it is certainly an option.


Saturday, March 6, 2021

David Lee King's Primer on Web Video

Update 2021 This is a very old post that leaped forward in time. I found the slide dead and was fixing things. This happened. I'm actually working on a project for podcasting audiograms. But from the early days some things stay the same.

David Lee King is a librarian and a videoblogger. This is a slide presentation on what web video is, what you need to get started and for those on the book beat how can it used to support the library's mission. 


Thursday, November 27, 2014

Keep It Simple - Digital Storytelling Chart

Well, I've passed the class and I'm in recovery mode. Lot of catching up to do and decisions to make.


In the meantime, I've been using Canva to create simple artwork. I like that they have a tutorial process to help users create better charts and social media signage. They also have free and paid templates.

Kinda cool.

Other Posts of Interest


Tuesday, October 28, 2014

Creating Digital Stories - Essential Shots to Record

There are times when it is very compelling to stand in one spot and record what you see. There are other times when you have to change it up a bit. What can I say, people like variety.

In the spirit of the holiday known as All Hollows' Eve aka Halloween, and the necessity to re-new, re-use and recycle,  I bring you a visual reminder of some of the types of shots you can make with a mobile device or any camera.


A long shot to lead the person into the video; to give a hint or sense of what is to come. 


An establishing shot to help your viewers know where they are in the video. You can be off to the side or a bit above or below; fee free to change up on the angles.


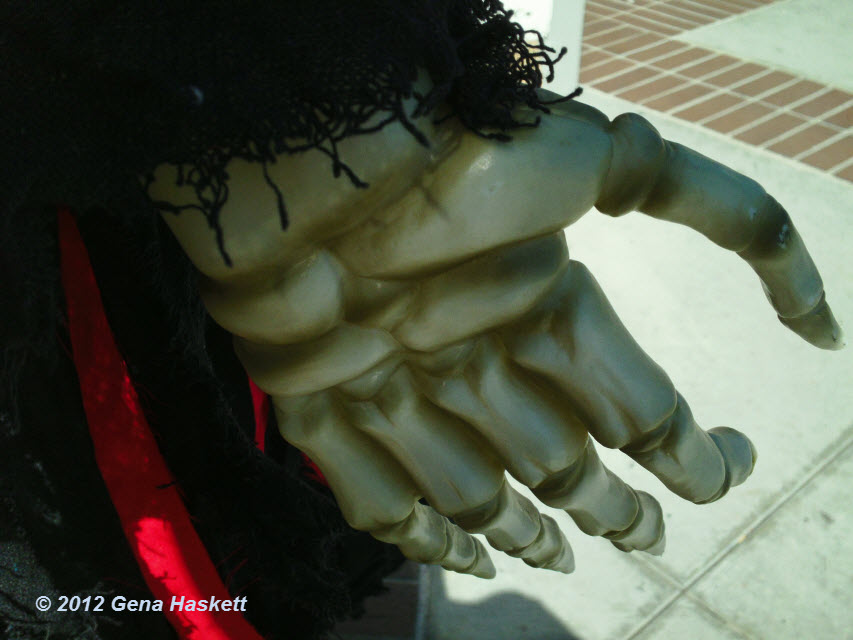
A  medium shot to get in just a bit closer to your intended. Adds a bit of focus to what is going on and that hand coming out of the lower left tells a story of its own.


A close up is intimate, forces a connection. Use cautiously with the un-dead because there may be things you don't want to see.  Again, shifting angles might help but in this ghoul's case; not so much.

The pumpkin? Ew, sinister.


The extreme close up puts your viewers nose right in it; make sure you have a very good reason for doing so.


The cutaway is a handy dandy way to use as a transition point. You can edit a cutaway into your video when you need to narrate a passagea and you need to get from one shot to another.

You want to get as many of those as you can that is appropriate for your video.


And if you mix and match well you will also have the making of the 5-Shot Method for getting the story:
  • A close-up shot of the hands
  • A close-up shot of the face
  • A wide shot 
  • An over the shoulder shot
  • A unusual or alternative view of the subject.
You get three out of five of these rascals and you are doing better than 80% of most videos. Be a 100% trouper and you will have story.

Other Posts of Interest

Sunday, October 12, 2014

Creating A Digital Story - Your Place on the Wheel

You have your idea. You have put it in a fixed form on paper or in a cloud. How are you going to show it? How will you tell your story? With what tools? How much time have you got? How will your audience technologically receive your story? Will it eat up their data plan?

What method would best serve your story? You have a lot of choices; the ideas below are just touch points/idea generators.


I have a expansive view of how to create a video. If you work it right a series of screen captures with narration could be a big hit. Who is to say that a well planned GIF can't be a digital story or a means of delivering a tutorial?

Ken Burns made bank on using history, old photos and narration with his documentary on the U.S. Civil War.  The New York Times Video unit is telling strong stories by using music, narration, photos and video.

And X=Unknown?

Yes. Because Microsoft is coming out with a new presentation format called Microsoft Sway. Other vendors are searching for ways to help users and creatives to tell stories more effectively without building from scratch. A new app could show up a week from now that will blow your socks off in simplicity.

There is another reason why you should think of this now.

Lets say you decide using photos and audio is the way to go. Your energy is now directed to getting the photos, recording your audio and finding the software that will help you assemble your story quickly.

That might be AnimotoSmilebox, Slidely, Roxio PhotoShow. It might mean using a presentation software like PowerPoint, Keynote or OpenOffice Impress.  It could mean laying out cash money for something like Photodex Producer; if you want a professional level of control.

Choices.

Other Posts of Interest

Wednesday, October 8, 2014

Pitcherific - All This And Storytelling Too?

No, I'm not backsliding - Pitcherific is an interesting web app that could help folks do a lot of things, give a proper elevator pitch, make a short presentation, or maybe help you to crystallize an idea for a video or podcast.


Let me be clear that my understanding of the intended purpose of the web app is to help people structure a verbal presentation. That is kinda nifty and the price is right (Free, at the moment).

But it is also the structure of basic storytelling. And for those of you doing really short videos this could be a keeper.

I don't know how long this web app will last but give it a try. Especially if you are giving a presentation on a dry subject.


Other Posts of Interest

Monday, October 6, 2014

Creating A Digital Story - The Script

You have thought about your idea. You've done the research and the dream catching. You know why you want to do this and your audience. Time to put it in a fixed form. Notice I didn't say write because it isn't the only way.

You can speak it out in an audio recording. You can draw freehand or in an storyboard format


For many of us we write it out. You can just make a simple text storyboard concept.


You can stroll through the collection at Printable Paper to see if one strikes your fancy.


If you have one of the comic book creation software you could even conjure a template out of that visual format. Find whatever works for you and make it so.

Other Posts of Interest

Friday, October 3, 2014

Creating A Digital Story - Reverse Engineering

A group of teen-age girls cuts denim pants int shorts and then a designer sees it and sells Daisy Dukes. Akira Kurosawa created the movie The Seven Samurai and Hollywood re-interprets it as The Magnificent Seven.

The process of making a knock-off is called reverse engineering.


The New York Times has an Ops Docs channel on YouTube where independent filmmakers can create work for the paper. This is the promotional video for the series.

If you are up to it you should break it down into parts

How long is the title?
What is the layout or sequence of shots?
How do they use text, audio and images?
Do they successfully get the message out about what they do?
Do they employ the five shot shooting technique?
Who is their audience?
What is the call to action (if any)?

If you don't like this video then find one you do like or would like to emulate. Break it down on paper or your recording medium of choice. It is really helpful to see what works.

Remember, inspiration good. Flat out stealing, bad.

Other Posts of Interest

Tuesday, September 30, 2014

Creating A Digtial Story Tutorial - Planning Brief

In the advertising world there is the brief. Long before they sell Skittles or a GoPro camera advertising firms create the advertising brief. It is a binder of what the goal of the campaign is; the message they want to communicate; who is the audience for the product and looking hard at the need or want the product potentially can fill in a user.

This is why advertisers are going loco-crazy about data collection. What do 25-year old women with disposable income and a love of pizza want in a shoe collection?

Yes, it gets that specific.  What has this got to do with you?


If you can calm yourself and listen to the inner creative muse you can use some of the same concepts of an advertising brief to get the idea of your video out of your head:

  • What your video is about?
  • Why are you doing a video?
  • Who is your potential audience? (Hint: it is not everybody. You'll need to think about who would want and appreciate seeing the video.)
  • What is in it for them? What goodies, needs or wants are going to be in your video.
  • How long will the video be; unless you are really good you are thinking about two to four minutes tops for web video?
  • Where will your audience see your video? Mobile? Desktop, TV hooked up to Roku?
  • Bandwidth considerations; 4K video is coming but many people are on data plan lock down? You might have to balance access versus quality, or you might choose not to compromise but this kicks back to who is your audience?
  • What you you have to work with? Camera, audio, equipment, no equipment, software, DIY gear?
  • Time? How much do you have and how little. In your allotted 24 hours a day where does creating a video fit in? 
So these are your starter questions. You'll have others that I don't know about but begin the process of writing down the bones.

Other Posts of Interest

Monday, September 29, 2014

Creating A Digital Story Tutorial - Pre-Planning

So, how do you get the story out of your head and on to the video? The same way you build a building or physical structure;
  • you have a idea
  • you map it out
  • tweak the idea a bit more
  • find out what you need and go get it
  • start from the bottom and work your way up.
Simplistic? Yes.
And no. Because you have to get that sucker out of your head and put it in a fixed form. There are a number of ways to do it.

You don't have to write; you can use your smartphone or mobile device to dictate your story or sketch it out. You can use a flow chart, a presentation program like PowerPoint or assemble a collage.

Journalism 5Ws

You could go old school and write down what you know about your story:
  • Who
  • What
  • When
  • Where
  • Why and with a How chaser.
Using 3x5 Cards

Return to the glory days of analog creation by using 3x5 cards to write or draw out your ideas. I wrote a post introducing the idea in 2012.  

Digital Story Workbook

You could do yourself a huge favor and check out Jennifer Aaker's Digital Story Workbook. It is a 34-page pdf from a workshop but it is easy to figure out the process of extracting stories from your head.

Whatever method you use the goal is to make a firm as possible your idea. This will help you write the script and get focused on the making your video a reality.

This is just a jump start. Next time, more on process of creating the story. Yeah, I'm going long on this one - step by step.

Other Posts of Interest


Sunday, September 28, 2014

Creating A Digital Story Tutorial - Overview

You have something you need to express to another human being. Of all the tools available you have decided that video is your best option.
Ok.  It is not the easiest of options but it isn't rocket science either. 


Now for you press a button and upload-ers I understand that this is too much work for you. Brain taxing. Too much effort.  My sympathies and have a nice day.

For the rest of us that really want to communicate effectively this is the way to go. It might not be as expedient as allowing a service to compose your story for you.

For the record;  I am not hating on those services; I use them as quick content generators or making an idea prototype. However, there is nothing like making your own story from scratch.

Don't need a lot money or fancy stuff. You probably have what you need right now or can get it in about a blink and a half. The good news is that there isn't just one way to do this. Not every digital storytelling method works for each kind of story and there are millions of stories.

My goal isn't to make storytelling on video complicated. It isn't. But trying to get the idea out of your head and on video can seem challenging. Let's find a paved road.

Other Posts of Interest

Thursday, September 25, 2014

L. A. Podcasting Festival and 2014 National Podcast Day Events

Never let it be said that the there is a firm wall between audio and video creators. We can learn much from our audio podcasting brothers and sisters.

Much doing in the land. First up there is the L.A. Podcasting Festival  September 26-28 2014 in Beverly Hills. If you think this is going to be a Nerd 101 fest you are .25 correct. There will be nerds but there will be a lot more comedy and and performance based podcasters. Think of it more as a film festival but for audio. However I suspect there will be a bunch of video recoding going on at the event.


And if you can't make it to the festival you can purchase a live stream ticket for the doings and beings.

On September 30, 2014 it will be National Podcasting Day and there will be live stream events to pluck much wisdom.


You can check out the event page for more info.

Whoops, so late, gotta go.

Other Posts of Interest

Friday, August 22, 2014

More Reminders About Recording Police

Mercy the joint is jumping. There is a way to record police officers and this is an example of what we can do to counter the lies, official lies and soon to be codified police reports.

This is the full video of the St. Louis Police shooting and killing Kajieme Powell. It is graphic. This is not make believe this is real life.


I am not going to make any judgements about the content or what has happened. There are already people on-line that are spinning fiction out of the facts of this video.

Reminders

If you are on a cell/mobile phone please remember to turn it sideways when recording. A minor point but for citizen journalism mobile videos you might want to consider it.

One thing I want to point out is keeping your distance from the police. No need to get up close and personal. Record what you can and make sure you have a couple of escape paths planned.

You can get caught up in what you see but don't let PD catch you. The above video refutes some of the official statements made by the police spokesperson. It is important to get it seen. After you record what you can get to a safe place at high rate of speed. Copy the video, put that in a safe place and then upload it.

If your phone allows you to upload immediately after recording do it. You can set the video to private and take care of business later.

Copyright Consideration

You retain copyright to your video. You do not have to watermark or put a copyright symbol anymore but there might be good reasons to do so.

I'm sorry to say that broadcast, cable news, and other people will appropriate your video. Appropriate/steal same thing. If you have time, put a watermark on it so that there is no questions this is your video.

If not a watermark then at least a copyright notice in your video. Some TV stations might do the right thing by offering you a license to use your video. Or pay you flat out for it. Don't get ripped off -- take the time to think about it before you sign an agreement.

The YouTube parasites that steal your video and wrap ads around it? Not much you can do. You would think you could slap a DCMA notice on the offenders. You can, but there will be so many people copying the video and posting to their accounts you won't have time.

YouTube isn't that helpful about news content being stolen. 

Let me see, anything else?

Oh yeah. I feel silly for saying this but if you have a pocket camera, smartphone or POV recorder you might be a bit more safe than pointing a traditional consumer barrel camcorder. Ohio police shot a man with a toy gun. They see something that looks like a barrel and I...just don't want to think about it.

In the house, okay. Outside be a little cautious about it. Yes, way better video quality but not worth your life.

Other Posts of Interest


Sunday, August 3, 2014

A Quick Look at Explee for Animated Explainer Videos

It seems that everybody and her cousin is coming out with an explainer video web app or software.

A few days ago, a friend shared with me an explainer video on a political topic. It was a combination of live action and pseudo animation software. It presented the point of view seamlessly. But I didn't agree with all the ideas presented. This is where critical thinking skills kick in but that is a topic for another blog.

Explee is a web app for creating animated explainer videos. Similar to Adobe Voice, you can upload your own .jpeg or .png images or use the images provided to create a video about a subject, idea or concept.

The video below is a good example of what you can do with the software:


There is a free version that you can obtain via an e-mail address and password. The video will have a watermark and other limitations. Paid versions allow users to download .mp4 videos to upload them to Vimeo and YouTube.

I tried out the free version on an idea project that I'm thinking about. Because I signed up for a free account, I can't embed the video but this is a link to the video page.  It is really rough but I was able to knock out a concept video in about 15 minutes.

For the most part it went well. I had some problems when I was typing text and I couldn't get back to editing out a mistake. It was easier to delete it and add it again. Really minor things like that.  The music was provided by the service; it was a easy as drag and drop it into the staging area.

I need to do more testing using it but it is a viable option for teachers, explainers and folks that don't have a video friendly concept.  I have to stress that it is easy to put a video together. It takes time to make a good video.

So if you don't want to spend cash money on an iPad and apps that may or may not work or you need a way of prototyping an idea or concept this might be the way to go.


Other Posts of Interest

Wednesday, July 2, 2014

Batch Video to Photo Converter Using Sony Movie Studio

Last time I mentioned how folks can use almost any version of Windows Movie Maker to extract a photo from a video. And if you have under ten photos this is doable. But what if you want to get a bunch of photos from a video clip?

If you have Sony Movie Studio, the consumer level video editing software you can do it in a snap. If you don't have Sony Movie Studio then check out the video editing software that you are using, it might have that feature. Eh, maybe. More about that at the bottom of the tutorial.

Step 1: Place the Video on the Timeline


It is assumed that you know how to put a video clip on the timeline. I would strongly suggest that you edit or trim to just the segments that contain the photos you want. Keeping the video under 1minute in length is good, 30 seconds is better.

Here is why: 30 frames per second x however many seconds of video = a heck of a lot of photos. You really need to trim your video to get just what you want or you could have thousands of photos on your hard drive.

Step 2: Select Your Hard Drive Location


Click the Make Movie Button and select, Save to Hard Drive.

Step 3: Select a Location and the File Type of Your Photos


Make sure that you know which folder your photos will be saved. You also have an opportunity to select the file type. If you know that you are going to make animated gifs then select gif. If you are planning to make a photo montage then jpeg would be a better choice. When you are ready, click the Render button.

When completed you will have a photo with either hundreds or thousands of photos.Yes. It can be a lot of photos.

What Is the Catch?

Yeah, there is one. Sony redesigned their entry level video editing software. There is Movie Studio and Sony Movie Studio Platinum 13.

Sony removed a lot of features and made Sony Movie Studio more user friendly. Kinda. From a quick sweep of the manual, I do not think that the entry level version allows you to batch convert from video to photo.

I believe that Movie Studio Platinum 13 does allow you to do the conversion.  The older versions of the software also perform the batch conversions.

Other Posts of Interest

Sunday, June 29, 2014

Extracting Photos from Video Using Windows Movie Maker

There are times when you might need to convert a small section of your video to photos. There are a lot of good reasons for this; you might want to make a montage or a gif animation.

You don’t necessarily have to buy an app or software to do this; you might have what you need already installed on your computer. I was just about ready to purchase software to convert photos to video when a wee small voice in the back of my head said, "Hey, don't you have software that can do that?"

Besides some of those video to photo software sites look real dodgy. I don’t want malware, spyware or a whole bunch of yuck installed on my system. 

That small voice also reminded me that I'm on fiscal lock down for the next couple of weeks. When I thought about it, I have a number of software programs that can grab a photo from a video so I'm going to share how to do that.

Cuz I'm a giver.

Windows Movie Maker and all prior incarnations. I'm using the current Windows 7 64-bit version but you can even do this on the XP version of the program.

Step 1: Load Your Video into Windows Movie Maker


Step 2: Move The Cursor to the Location Where You Want to Extract an Image


Click the area in the video you want a copy of the image. You are looking for a black vertical line that will match the image in the Preview screen. The photo is going to be the same size as the video. Meaning, if you recorded at 1280x720 your image is going to be the same size.

Step 3: Click the Snapshot Button-thingy


Yes, it is that simple. Click the button to open the place where the photo will be saved. You can accept the system generated name but I would suggest changing it into something you will remember.

For those of you on an older version of the program there is a camera icon on the Preview screen. It works the same way.


 In my version of Windows Movie Maker the photo will be saved in the PNG format. Not a bad thing unless the program you plan to use the photo doesn't accept PNG images. Now days that is rare. Not to worry; if it doesn't you can always go an image editing site like Autodesk's Pixlr to convert the image.

And that is it. No muss. No fuss. And you can save yourself $20 and potential harm to your system.

Now, this is ok if you have at best five to ten photos to extract. If you want to extract 100 at a time then this isn't the way to go.

Anything Else?

Yes. The modern version of Windows Movie Maker plays a lot nicer with a video files formats. It will accept most but not all variations of MP4 videos. It doesn't like videos that are associated with the Quicktime format.  

The quality of your photos is going to be as good as the quality of your video. If you are thinking about making prints from the images it might be okay or it not quite up to snuff for anything larger that a 4x6 photo. Then again, something could be better than nothing.

Other Items of Interest

Wednesday, June 11, 2014

One Camera and Tripod - Make Music Pasadena

It was a good day. Not to hot or to windy. The first performer I recorded was Luke Sweeney from San Francisco. The band was good and I wished that more folks would spread out and try to find the jems on the backstreets.


It is an aim camcorder and record video. I had a tripod. I tried like heck not to use the zoom. I made a decision about getting the whole song without a lot of fuss. You'd think that with a tripod I'd be all up in his nasal passages.

Nope. I had one chance at recording a song . The telephoto on the camcorder does not move freely. It jerks. Or stutters.

Kinda does both actually.

So, yes it is a miner 49 kind of video. I didn't think of it until later but my still Panasonic camera could have done some duty and recorded close ups and alternative views of the stage.

Which is why you have to get out and experience recording and not just read about it. There are ways to make one camera videos more interesting.

I just have to remember how when I'm out and about.

Other Posts of Interest

Sunday, April 13, 2014

5 Things to Remember for Event Recording

It doesn't matter if you record on a smartphone or a dedicated camcorder user, you can improve the quality of your recording by making sure you have what you need to get it right.

I've made okay videos and I've made stinkers. This is a 2006 converted event video from the Blip.tv days of 320x240 web video recording.


This year I want to raise the level in an upward direction. I paid serious cash money to learn how to do better so this is the game plan:

1. Pre-Planning or What Are You Doing?

Are you going to the event to enjoy it and snag a memory or two? Are you going to give the essence of the event? Perhaps you are on a story hunt trying to find the central theme of the event?

You need to think about the kind of recording you want to make and those shots that would best represent your idea. You don't have to locked into a preconceived notions of what you think you will see; we ain't the news media. You do want to record video that capture the feeling of the event.

I'm actually talking about two things. Coverage - the crowds, the vendors, the performers, the sights and sounds. You want to bank those type of recordings to give yourself natural transitions and goof protection.

The other thing is the recording you have to have to make it clear to your viewer what they are seeing and why you think it is important.

2. Charge!

Make sure that your device(s) is charged (powered) and that you have backup power if you need it. If you have a spare USB charger and cord take it along; you never know if you have access to a spare A/C (Mains for UK folk) plug.

3. Got Room on the Card?

Yes, this is a gotcha. You might have a 32GB card in the camera but you only have 6GB of recording space available for recording. Back up your prior recordings and give yourself some recording room.

4. Stabilization

I really hate the jitters in my videos. Sure, I can turn on image stabilization but there are times when I need to use the zoom lens to see someone on stage. Using the zoom lens will amplify the jitters and the shakes.

Here is the thing. I have two heavy tripods. Hardly ever use them because they are a pain to take on public transportation. I use to have a thin travel tripod; I am in search of it but I think it broke a year or two ago.

So I am looking for a compact monopod that I can carry to keep the jitters to a minimum.  There are monopods that sell as low as $16 and as high as $250+.  Find your sweet spot and stick to it.

5. Hold Still

Count out ten seconds, hold your breath for ten seconds do what you have to do. Fight the whiplash. With few exceptions if you press the record button you aim for ten seconds before you move.

Yes, your subject might move out of the shot. Or the poet moves from one part of the stage to the other. Give them ten seconds to move back. Or compose the shot wider so that it doesn't matter where they move you got them.

Bonus Tip - Have Fun.

It is a process. It is a challenge. But in the end of the day you are outside, meeting people, being exposed to new things.

Event recording for a vlog or personal use shouldn't induce pain or cause you to be a jerk.

Take it easy.

Other Posts of Interest